You will not believe it, but I finally decided to make a STEP BY STEP tutorial for my famous home made stamping decals. As you know, I don't use the reverse stamping technique, since I don't have always that much time for my nails since I have a little baby, so I make my own decals using my stamping plates and coloring them images. The good side of these decals is that you can store them, and use them whenever you want and you have a lack of time.
STEP 1: PREPARE ALL THE THINGS NEEDED
1. a piece of baking paper
2. a clear nail polish (not to thin not to thick)
3. a stamping plate
4. a stamping polish
5. stamper and scraper
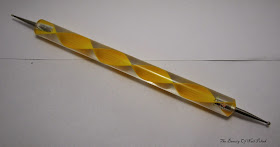
6. a dotting tool - use one of smaller size so you can paint the details carefully
7. polishes to paint the design
8. place/box to store the decals
STEP 2: APPLY CLEAR NAIL POLISH ON THE BAKING PAPER - WAIT UNTIL DRIES
STEP 3: USING YOU STAMPING POLISH, STAMPING PLATE, STAMPER AND SCRAPER STAMP YOUR WANTED DESIGN ON THE AREAS WHERE YOU APPLIED CLEAR NAIL POLISH
STEP 4: USING YOUR CHOSEN POLISHES AND YOUR DOTTING TOOL PAINT THE INSIDE OF THE DESIGN AS YOU WISH
Now your decals are finished! The final result looks like this when you turn around your baking paper!
This is the way you then apply the decal on your nail - but I will write another tutorial for the exact application of the decals!
STEP 5: WHEN THE DECALS ARE DRY, STORE THEM IN A BOX FACING ALL THE PAPERS THE SAME WAY SO THEY DON'T GET STICKY
This is how I used the decal described in this tutorial:
I hope this tutorial is helpful and you enjoyed reading it!


f great idea
ReplyDeleteAs I don't have that much time - this is the only way I have colorful nails! :)
DeleteSuper , Tara thank you ! i could try on baking paper too:)
ReplyDeletemanicure is amazing , amazing !
Thanks so much! It works great, but you have to make sure the clear polish you are using is thick, but thinner than Seche or Poche for example!
DeleteTole je pa super zadeva! Moram sprobati :)
ReplyDeleteKar kar :) Preverjeno deluje in to najbolje s točno tistim Essence top coatom kot je na sliki! :)
DeleteI never thought about the baking paper, I tried on a ziploc but I wasn't very successful. I'll try this method. Thanks :)
ReplyDeleteTry it and please let me know how it turned out! :)
DeleteThank you so much, I have been wondering if you can store decals :)
ReplyDelete